A Quick Guide to Digital Video Capture

Amongst the great joys of digital video is the ease with which footage can be transferred, archived, edited and distributed. In contrast with traditional, analogue cameras, it should be very easy to get your film from camera to computer and, if you wish, from computer to DVD or Internet. The process of getting footage from your camera onto your computer is known as capture.
The term ‘digital video capture’ suggests that the process may be complex. However, perhaps a good way of thinking about it is to compare it to copying photos from a memory card onto your computer. The fundamentals of the process are exactly the same; you are moving digital information from one place to another. The only difference is that the software doing to capturing needs to work out where the start and end of your footage is.
Capture Software
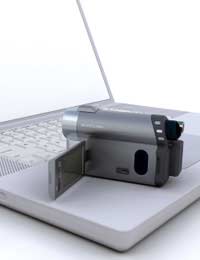
There is a wide variety of software available to perform digital video capture. While each will have a different interface, the basic processes will remain the same. Both Windows and OSX include basic software to help you get your footage from your camera onto your computer; unless you are performing particularly complex tasks, or bringing in a lot of footage, these programs should suffice.To begin with, you need to connect the camera to the computer. Depending on the model of camera, you will have access to either a USB or FireWire port. You should remember, however, that not all computers have FireWire inputs; you should consider this when buying your camera.
Your operating system should recognise your camera as soon as you plug it in, as long as it is ‘plug and play compatible’; most modern video cameras are. After this, you should launch your video capture software.
Transport and Preview
Most software will have a series of ‘transport buttons’ clearly visible on one of the first screens. These play, stop, fast forward and rewind buttons control your camera, meaning that you can give instructions to the camera from your computer. You will also have a preview window which will give a display of what is on the tape. The transport buttons allow you to view the footage on your camera in order to determine what you want to capture.Having looked through your footage, you need to set ‘start’ and ‘end’ points. These digital markers tell the software where to begin and finish capturing. Depending on the complexity of your software you may be able to set multiple start and end points. Each of the pieces of footage you choose will then be imported as a separate ‘clip’.
Finally, you should consider the quality settings on your software. Most capture software will offer you a choice of quality; simple programs will probably just offer ‘low’, ‘medium’ and ‘high’. You should remember that this will determine the maximum quality at which you can ultimately burn your footage to DVD. As such, you should always capture video at the highest possible quality (preferably in a lossless format) if you have sufficient storage space.
Business Energy With a Difference
If you are looking for business energy or need advanced solutions like remote energy monitoring, new supplies, downgrading or upgrading capacity, have a no obligation chat with Purely Energy.
To find our more get in touch here. or call 0161 521 3400.