A Quick Guide to Steady Camera Techniques

Amongst the most difficult challenges facing videographers, regardless of their experience or talent, is that of simply keeping the camera steady. This is clearly not a problem if you are shooting static subjects from a static position; in these cases you can pick up a tripod for £20 and your problems are solved.
However, most of the footage you actually want to shoot involves lots of movement; kids running around, panning shots across a group of people – these all require movement on the part of both the subjects and the camera operator.
What is a Steadycam?
In order to combat this problem, professional cameramen use ‘steadycams’. A steadycam is an intricate piece of equipment which attaches to both the camera and the cameraman. It uses a pulley system to prevent excess camera shake, even when the cameraman is moving around. Unfortunately, a professional steadycam solution is likely to set you back around £1,500. The good news is that it is possible to construct a DIY ‘steadycam’ for very little money.Before looking at building your own steadycam, it is worth noting that camera manufacturers have already done some of the work for you. Many digital video cameras now include ‘image stabilisers’ as standard. This means that the cameras include software that works out when the camera is shaking, and compensates accordingly. It does this by inserting pixels of the relevant colour in order to maintain the detail of the shot. This is particularly useful on cameras with long lenses; a small movement when zoomed in is magnified by the same degree as the image itself.
Building a Steadycam
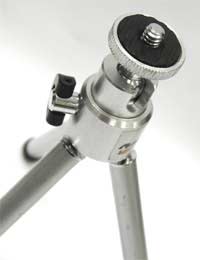
If your camera does not have image stabilisation, or if it is insufficient for your purposes, you may wish to consider building a steadycam. The basic principle is that the camera should be weighted down, in order that the effects of any sideways movements are minimised.A basic steadycam setup will therefore involve a pole (preferably extendable, so that it can be adapted for different circumstances) onto which the camera can be attached. You may wish to use the central part of a regular tripod for this, as it will already include a standard sized mount. A second pole should be attached, running perpendicular to the first. This is used as a handle; you need not touch the camera – rather, you can place one hand on each pole.
A weight should be fitted to the bottom of the longer, vertical pole. This is the key element, as it helps to keep the entire structure steady. As such, the size of the weight will depend on the size and weight of your camera.
Finally, you may wish to include a harness of some sort. You could attach a harness to the horizontal pole, giving considerably more stability; in these cases, the camera is stabilised by the weight and your own body. Climbing harnesses are particularly suitable for this, and can be bought relatively cheaply.
It is possible to construct a perfectly reasonable steadycam for around £50. Clearly, this is significantly more viable than the £1,500 that you would otherwise spend on a professional model.

Re: Storing Videos to DVD and Your Computer
Kak esehiko sminor k112 familyvideos.co.uk
Re: Storing Videos to DVD and Your Computer
Hello. Great community! Looking for lock advice. Thanks:)
Re: What You Need To Know About Filming in Public Places
i am wanting to live stream my garden from my web camera , i have read the laws on property…
Re: What You Need To Know About Filming in Public Places
What kind of public places need liability insurance? We're filming for a piece of course work for…